
First, create a new image about 600x600 pixels (or whatever size is appropriate for the image you plan to create). If you haven't already got a shape that you want to apply this effect to, now's the time to make something. The shape in the example is simply made up of 2 circles blended together. Once you have your shape, fill it with this shade of gray:
#E6E6E6. Keep your shape on its own layer and make sure you have nothing selected (press CTRL+D).

Most of the steps from this point on will be using Layer Styles, which are available in Adobe Photoshop 6.0 and later versions. Once you've created this layer style, you can save it and use it instantly whenever you want, without the hassle of re-entering all the settings every time you need this effect.
With your shape's layer selected, go to Layer » Layer Styles » Inner Glow, and match up your settings with these: Inner Glow
This gives our shape its first hint of a bevel.
Next you'll be adding a bright highlight (the lightsource). Click on the
Inner Shadow category to the left, and match these settings:
Inner Shadow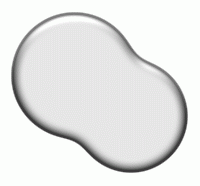
Next click on
Gradient Overlay and dial in the following settings:
Gradient Overlay To add a final touch to the smooth metal, click on Satin and match these settings: Satin Settings
Your smooth metal style is complete at this point, though you may wish to add in an optional drop shadow.
But wait... do NOT click OK yet. Remember, we want to add this layer style to your arsenal so you can call upon it when ever you need it.
Click at the top where it says Styles
Now click the "New Style" button and give your style a name such as "Smooth Metal", then click OK. You should then save your styles by clicking the arrow icon to the left and choosing "Save Styles" from the list.
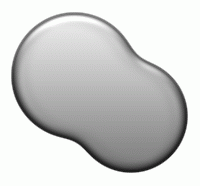
At this point your basic smooth metal panel is complete, though if you'd like, follow along and take it to the next level. In the example, a glowing orb has been added, which you can learn to create with the
LCD Orb tutorial.
To make the orb appear as though it's inset into the metal panel simply complete the following steps...
Place the orb onto your image, and create a new layer UNDERNEATH the layers containing your orb but ABOVE your smooth metal shape.
Now select the ','black')" onmouseout="hidetooltip()">elliptical marquee tool, and draw a selection so that it's just a little bigger than the original orb. To make this easier, place your mouse in the center of your orb, and hold SHIFT and ALT at the same time and drag your selection. Now, select your ','black')" onmouseout="hidetooltip()">gradient tool, and use the following settings:

Drag from top to bottom over your selection to create the inset effect. When done press CTRL+D to deselect.

Now, with new gradient-inset layer you just created still selected, go to
Filter » Blur » Gaussian Blur and use a setting of about 0.5 to make it a bit smoother.

You can now apply the same techniques to other "stuff" you want to add to your new interface. Here's an example. Be creative and enjoy your new layer style :)
 http://www.absolutecross.com/tutorials/photoshop/interfaces/smooth-metal/


 Kemudian akan loading beberapa saat. Dah siap klik link macam kat bawah ni yerk.


))
))
))
))